 |
| Caustic test prints by Toni Hartill |
As a rule I steer well clear of any processes that involve toxic fumes and nasty chemicals but...
we were introduced to
CAUSTIC ETCHING LINO
To be honest I wasn't too keen. Dianne calls it the MONGREL etch!
And when she donned all the safety gear... well... I was walking backwards outa the room!
BUT...
actually it did show potential.
I had prepared a lino block by painting a pattern with ashphaltum. This was duly etched by the ever intrepid Dianne in full kit and... actually it has proved to be a very versatile and effective plate that I have used extensively.
 |
| My caustic etched lino being inked up by Dianne Fogwell. |
So, it did warrant further investigation.
In this blog I will firstly outline what I have trialed, and succeeded or failed at, then I will give more specific notes on what was successful (repeatedly) for me in case you want to give it a go.
Make sure you read labels and follow all safety instructions! Caustic soda burns!
Also work outside with plenty of ventilation and have plenty of water on hand for accidental splashes and spills.
Session 1: fellow printmaker Celia Walker joined me for mutual support and bravery
and we trialed
the Caustic Bath Method (as shown by Dianne)
and
the Gel Method (as found online on various sites including
here.)
BATH METHOD
I prepared a test plate with an array of various resists.
 |
| Resist Lino Test Plate for Caustic Etching |
This was etched in a bath of caustic solution as per our instructions but it wasn't a roaring success. As you can see in the image below, the areas that are being etched are strongly patterned. I realized AFTER I had applied most of the resists that I hadn't degreased/ sanded the lino first so then DID sand it for one remaining square (the Resene Concrete Clear) and the results were much better. However, we found this method quite a palaver with having to be super careful not to splash or spill, the lino needs weighting down as it curls, and ... actually it was very slow-working. The lino needs to be in the solution for up to an hour and by this stage many of the resists were wearing off before we had achieved a deep enough etch.
We were expecting something a lot more dynamic! We were left feeling a bit over-amped and overdressed for the occasion. Although all the safety gear IS A MUST with this technique.
 |
Test plate shows the exposed lino being etched in a pattern,
probably due to not being sanded first. |
The test plate was interesting to see which resists stood up better than others.
My preferred one is the Resene Concrete Clear (because I have it and use it for multiple things - it's basically an acrylic clear glaze). It gave a crisp edge to the etching and seemed to adhere the best for the required long etching time.
 |
| Resist Lino Test Plate for Caustic Etching - etched and cleaned. |
GEL METHOD
This method is a lot safer and more controlled. A gel is made using wallpaper paste to thicken the solution and it can be "painted' on directly to the areas of the lino that you want to etch. Because the gel is thick there is little risk of splashes and spills once the gel is prepared and, apart from a wee waft of fumes given off in the initial mixing, the gel is not at all pungent.
Gloves, plastic apron (hence our Snoopy aprons) and safety glasses are still a must.
 |
| Preparing the Caustic Gel. |
 |
What happens to a brush
if you use it to paint on Caustic Gel! |
Note to self: Don't use a brush! Use a wooden spoon or spatula.
 |
| Spooning the caustic gel onto a prepared lino plate. |
This method felt much more controlled and, with a bit of tweaking to the recipe, showed much more promise for further investigation.
Session 2: GEL METHOD
Taking what we'd learnt, I retested this method.
Step 1: Paint on the resist and leave to dry well.
I used Resene Concrete Clear, but see my test plate above for other ideas of resists to try.
 |
| Applying a resist to the lino for etching in caustic. |
Step 2: Make up the gel:
I used a 340g jar.
Into this I mixed 1 (plastic) tsp of wallpaper paste with a dash of water - this is the tricky bit because the paste immediately goes into a thick lump - which you don't want so it takes a bit of practice to sprinkle the paste into some water and mix quickly to break up any lumps.
Take the time to squash away the lumps. Add more water until the jar is about 1/3 full. Mix and leave to thicken for a few more minutes.
Add 3 tsp of caustic soda granules and mix in well.
The mixture heats up instantly and goes white and a bit frothy.
Step 3: apply the gel:
Don't use a brush - it WILL dissolve! (Speaking from experience here...)
Use a wooden spoon/ spatula ( I shaped my own fit for purpose) to apply the gel to the lino.
 |
Place your lino on plenty of newspaper
and possibly in a large tray. |
The lino immediate starts to yellow where it is etching.
The longer it etches the stronger the colour.
 |
The lino turns a strong yellow showing
where it is being etched. |
Watch the areas of resist to see when/ if it is being etched through and you may want to stop it etching any further. (You can always reapply resist to some areas and re-etch it.) So, when you are ready to stop the etching, place the lino in a sink and wash it well with running water. Pour over a dash of vinegar or lemon juice to neutralize the caustic (the lino will turn back to grey showing it is no longer etching). Scrub the lino well, front and back, dry off on an old towel and leave to dry.
Ta-daa!
 |
| Caustic etched lino by THartill |
As you can see by the texture, again, I forgot to degrease/ presand the lino!
But actually the texture is quite appealing and it could be used to advantage.
 |
| Caustic etched lino by THartill |
I have since carved away areas of the lino to get a combination of effects.
 |
| Caustic etched lino and print by THartill |
Most of the Resene Concrete Clear washes away with the scrubbing. In one of my plates (as seen below) there is still some remaining on the plate. Possibly, because I reapplied it and re-etched it to get more texture, it was quite thick in places but I have since printed the plate and it doesn't matter that it is still there in places.
Feeling fairly pleased with these results I have gone on to make some more lino blocks to use as texture plates in my current work.
 |
| Applying resist to lino - THartill |
 |
| Etching lino using gel method - THartill |
 |
| Caustic Gel at work - THartill |
 |
| Caustic Etched lino - THartill |
 |
| Caustic Etched lino - THartill |
 |
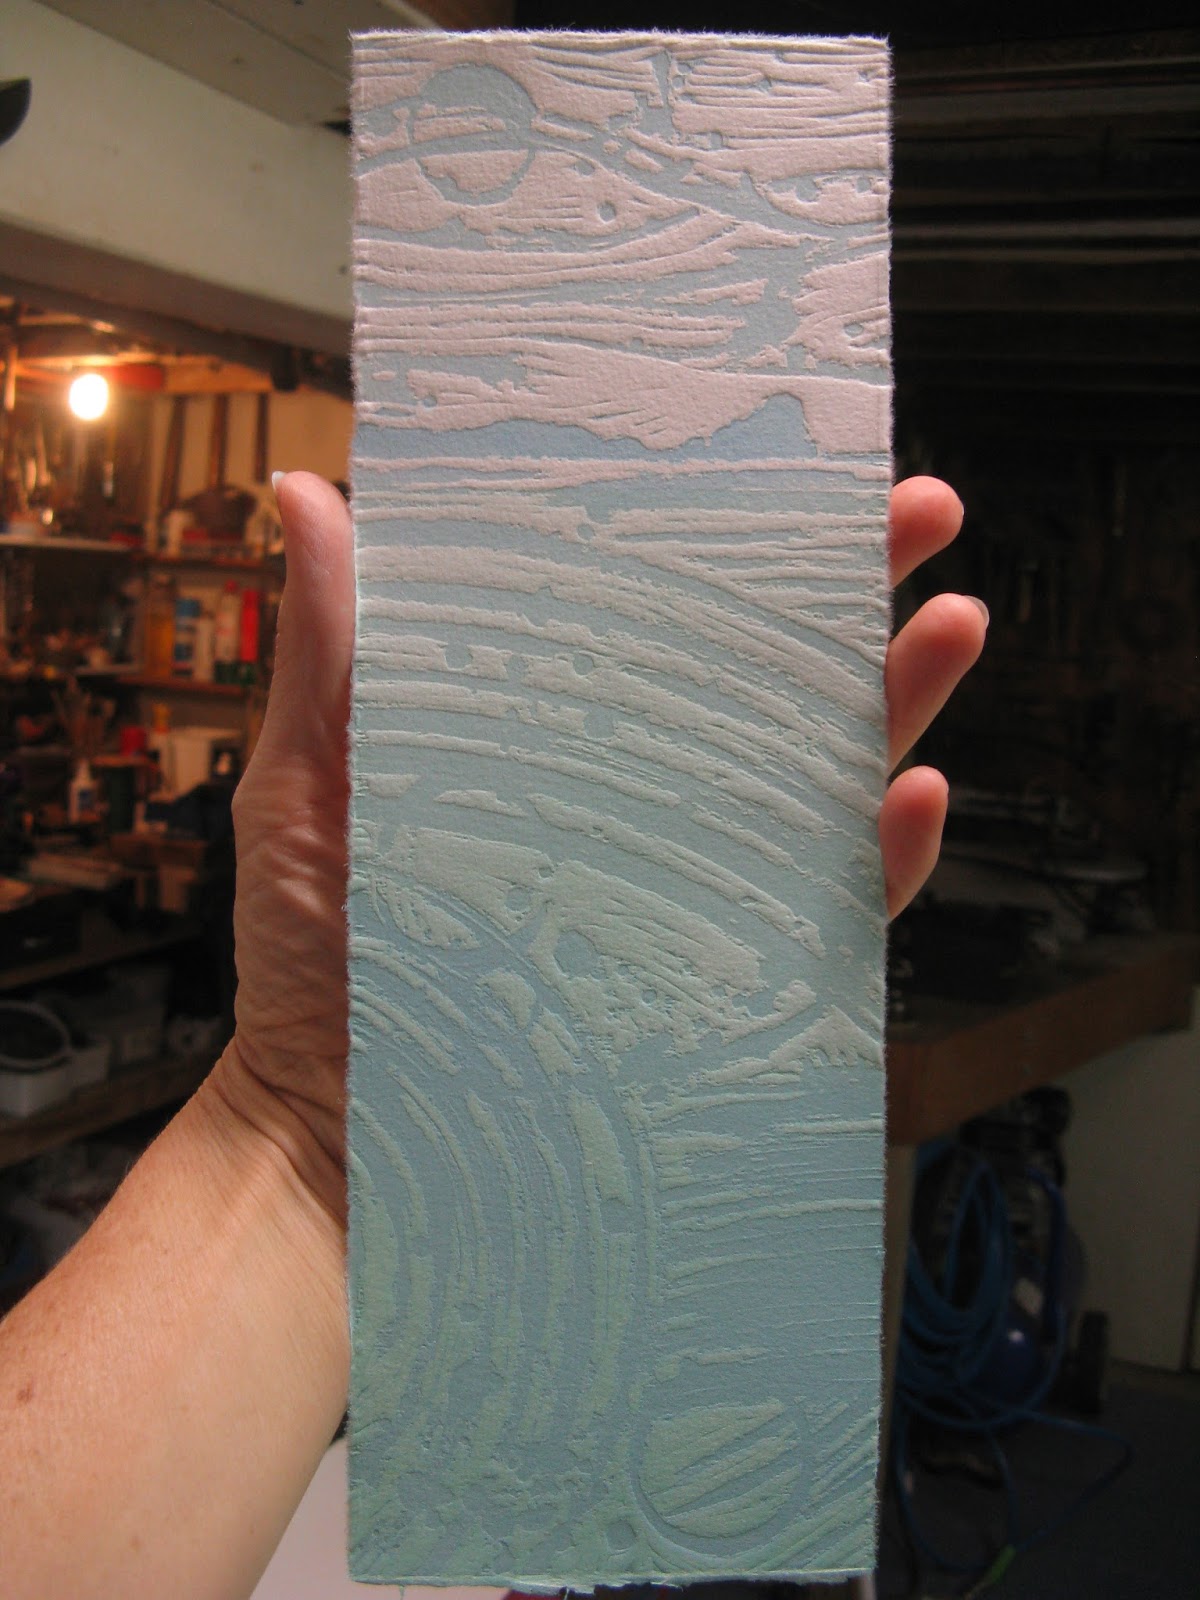
| Proofing the caustic etched lino - THartill |
 |
Samples of test prints using caustic etched lino and
caustic etched plywood - THartill |
Hope you find this interesting and helpful!
Happy, and safe, printing!


