|
| "Where shall we go today?" Bundle Book by Toni Hartill |
I've recently been making some more upcycled board books, or what I affectionately call my "Bundle Books" and I thought that others may be interested to know how I create them.
Now, to be clear, this isn't a cookie-cutter process. Every book evolves organically and without much planning. Or if I think I have plans, they are very soon abandoned as the creative process takes over.
Although my basic process is simple, the steps I take can be quite complex and I love/can't help myself, when it comes to the final embellishing and titivating.
Anyway, I hope you find this interesting.
Please let me know if you give it a go to create your own book -I'd love to see how you get on!
Please tag me:
#tonihartillart
@tonihartillart
#tonihartillart_bundlebooks
Inspiration
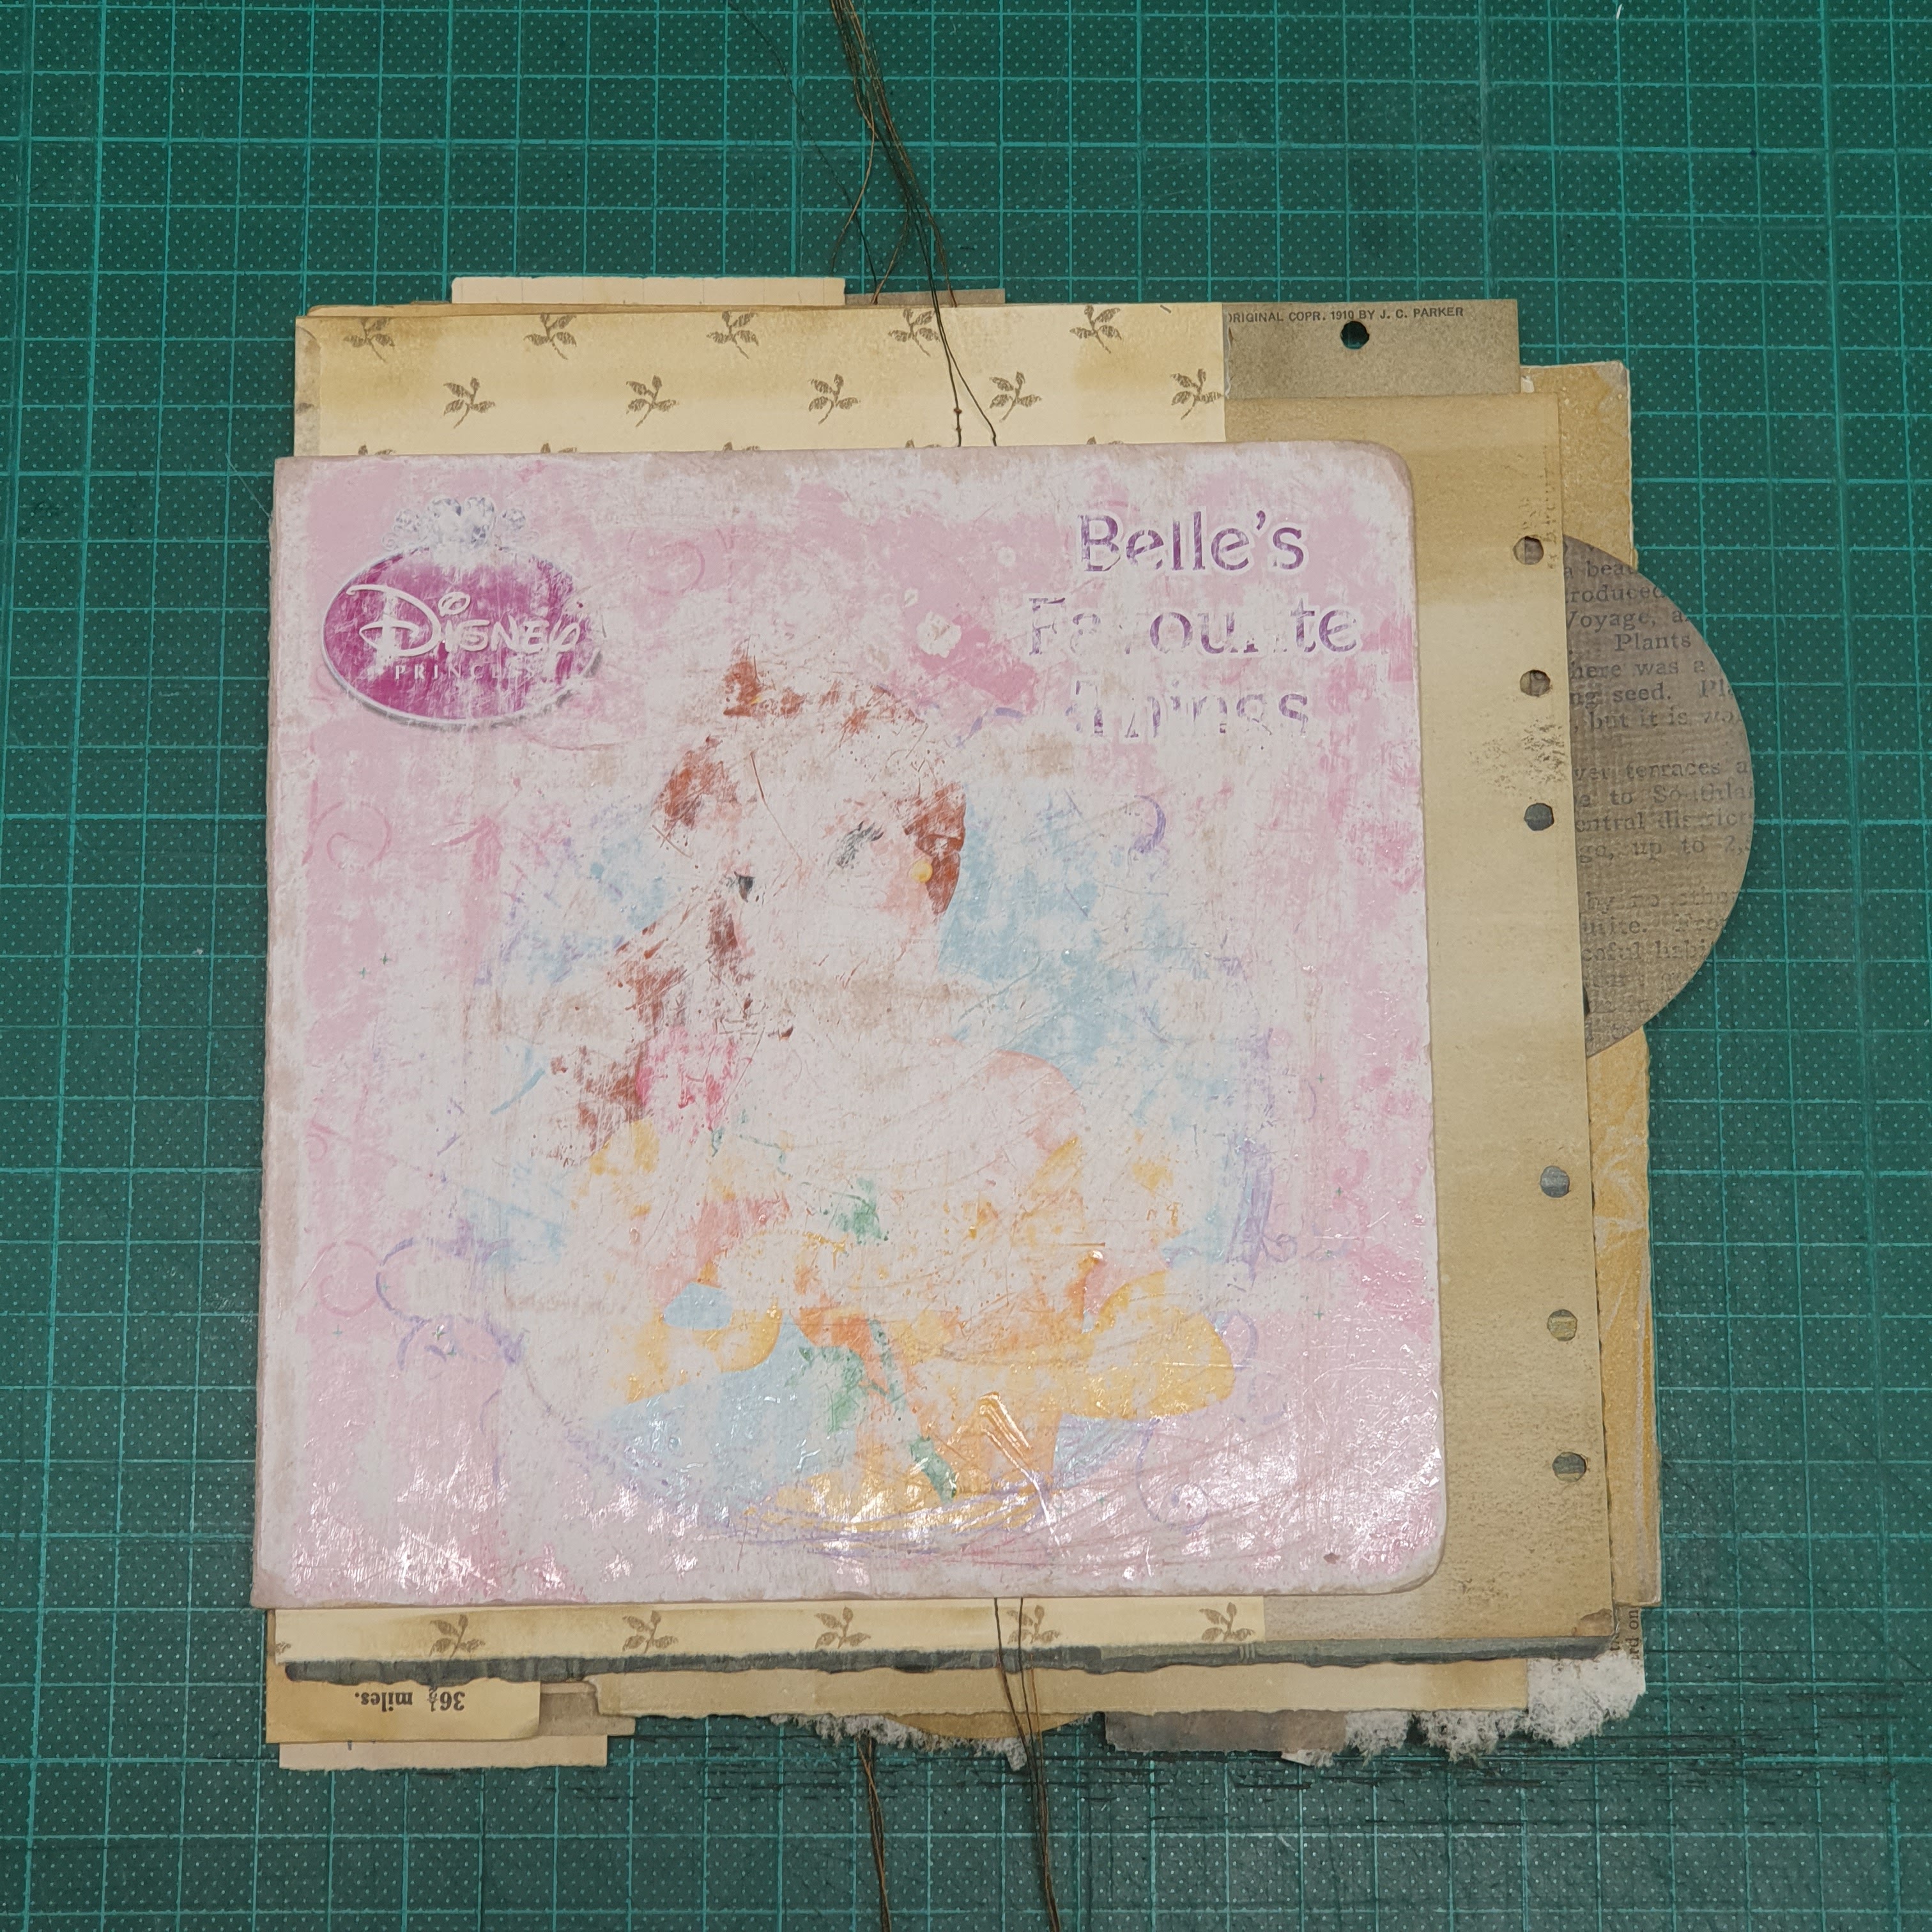
My inspiration for these books came about by a happy accident. While packing up a group exhibition, Scattered, I noticed the gorgeous little bundles that were forming as I stacked my installation pieces. I loved how these bundles formed and wanted to try to recreate these "bundles" as an artwork in themselves, that could be handled and manipulated. One day, in a junk shop, I picked up an old, preloved child's board book for $1 and began to experiment with how to turn it into a "bundle."
Remanent
This book evolved out of a desire to repurpose some small, unframed artworks of varying shapes and sizes. The title of the book, emerged serendipitously, as a scrap torn from an old dictionary presented itself, aptly describing the creation that had emerged. (And yes, it is spelt correctly.)
Repurposed prints, offcuts and scraps, found ephemera, old charts, fabric, ribbon. 2021.
 |
| "Remanent" by Toni Hartill |
 |
| "Remanent" by Toni Hartill |
 |
| "Remanent" by Toni Hartill |
Preparing the Book
As mentioned, I source preloved board books from second-hand shops.
The first thing that needs to happen is to sand them well - every page, both sides, to remove the glossy coating so the glue will stick better. If I want to change the size or shape of the book I use the bench saw to do this quickly and neatly although it would be just as effective (but much slower) to use a sharp knife and steel ruler.
I then paint the centre folds of every double page with gesso and leave this to dry REALLY well.
Then, using acrylic paint, I top-coat the gesso with an approximate colour that will blend with the colour of the pages (if I know roughly what colour the pages will be, otherwise I leave this step until a bit further down the track.) You can see I've also cut a circular hole through one of the pages. I will have already made decisions about the composition and order of my pages to do this.
I remove the piece of cardboard covering the spine. Why? Because it eases the tension of the pages from the added bulk once they begin to have paint and layers of collage added.
Making Papers
For my latest books I've started by creating a "storm" of monoprint pages. Yes, I think the collective noun for the carnage I create at this stage is aptly called a STORM!
I kept to a limited palette while creating a myriad of sheets with found textures, mostly with a particular loose theme in mind.
Collating and Rearranging
I then sift and sort through my stash of papers, ephemera and previous reject and/or recycled print material and begin collating, arranging and rearranging the pieces into different combinations. I'm looking for groupings that catch my eye, that conjure up ideas for narratives and that form interesting compositions.
I find that this stage can take a LOT of creative energy as there are constant decisions to make and remake and make again as the pieces cycle and circulate around the table(s). To the untrained eye I imagine this could look like sorting confetti.
Using a View Finder
Using a viewfinder, a paper window cut to the size of your finished pages,
can certainly help isolate the bits that bling from all the other detritus.
Composing Pages
After MUCH put-and-take I compose and construct a series of collages, one for each double-page spread. I consider what the order of the pages is - how the colours and compositions will flow, what begins the narrative and what will end it.
The collages may be glued together and/or stitched with visible machine or hand stitching.
As you can see, I like to have my collages spill outside of the book's pages but you could also aim to trim back your collages, flush with the page edges.
Gluing In-situ
Once each collage is ready for each page, I glue them into the book paying careful attention to getting the placement just right - nice and close to the centrefold but not so close it will hinder the easy turning of the pages.
In this initial gluing stage, I just apply glue to a square in the centre of each page so I can continue to tuck in extra layers until I'm satisfied. I go back and glue down the edges of each of the pages later.
It's a good idea to colour the back of any extra overlappy parts of the collaged pages so you won't have stark bright "backs" that will need to be disguised, after the fact. In this book (below) there are areas that overhang quite a lot!
Considering the Cover
I usually leave the covers until I've composed the inside of the book but I may have had an idea of what I might like to use from the start.
Again I create a collage using all manner of pieces from my stash. Here, I've created a cover for the front and back from an old page from a botanical pamphlet with "New Zealand" printed on it. For the front cover I decide I want to layer my gel print on top.
Once I've considered how the covers overlap with all of the overhangs of the pages, I glue them in place. Make sure the front cover and the back cover line up with each other and they sit neatly along the edge of the spine.
The Spine
Choose a piece of paper or cloth that will complement the covers. Cut to the same height as the covers. With an overlap of at least 1cm but ideally maybe 3 or 4cm, glue the spine in place starting at either the front or back. Weight it and leave it to set before wrapping it around and gluing it to the other cover.
Note that the effect I am going for with these books is not a properly bound book with all edges finished, trimmed and spick and span. They are more quirky, focused on celebrating the found and repurposed bits and bobs and giving them new life. For me, it's all the overlaps, torn scraps, tiny details and a fair smattering of wabi sabi, that gives these books so much character.
Once the covers are done I then spend an indeterminate amount of time tinkering and titivating, adding tiny details, searching for just the "right" scraps to finish off each page, tucking in more tabs and snippets to embellish til it feels just right.
Finally, using a small brush or glue on a small palette knife, work in glue around each of the pages to glue the collages snugly back-to-back to hide any raw edges and loose bits.
Ta Dahh!
And just like that, after several days, many, many hours and lashings of fun,
a unique wee Bundle Book emerges.
Just when I think I have finished, I will often find that I go back to sneak in just one more little scrap or embellishment. The titles for my books slowly emerge, inspired by the contents of the book or a word or scrap that finds it's way into, or onto, the pages.
"Where shall we go today?"
 |
"Where shall we go today?" Bundle Book by Toni Hartill
|
 |
"Where shall we go today?" Bundle Book by Toni Hartill
|
"haven"
 |
"haven" Bundle Book by Toni Hartill
|
 |
| "haven" Bundle Book by Toni Hartill |
These books will be exhibited in a solo exhibition of my artist's books, later in 2023.
Stay tuned for updates and details.
I hope you find this inspiring.
Please let me know if you give it a go to create your own book.
I'd love to see how you get on!
Please remember to attribute my work and/or tag me:
#tonihartillart
@tonihartillart
#tonihartillart_bundlebooks
Thanks so much for visiting!
Follow my blog
by clicking the follow button in the right hand sidebar
or
Follow me on Instagram or Facebook
for updates and more behind-the-scenes fodder
@tonihartillart
&
SUBSCRIBE to my NEWSLETTER
for the occasional update to your inbox.