Friday 30 August 2013

100 Days - Day 85, 15 days to go!

As I come to the end of the 100 Days project I'm thinking about what I have gained from the experience and what I might do if I was to do it again. I'm already planning a few shorter projects to do on my own because it's a great way to get things happening and to achieve a particular task.

So, as the project draws to an end - only 15 days to go - here are my thoughts on an insight I have gained from participating in this project:

One of the reasons I wanted to be disciplined to draw everyday is because, having returned to my arts practice after a long break, I have wanted to get back to doing some illustration work and I wanted to develop my own style and polish my skills. I haven't drawn much at all for a long time so I was feeling very rusty and doubtful.  Very early on in the project however, when I had completed perhaps 2 or 3 pages, I shared my book with others at an artists' network meeting and the feedback I received made me realise that I did, in fact, already have a "style" to my work. It also made me appreciate and accept (at long last) that no matter how I might try or think otherwise, I still have an intense attention to detail. It's how I work, it's what I do. I suddenly realised "why fight it? Just accept it and make the most of it."

So, my insight was of acceptance of my way of working.

You can view my earlier post on this project HERE.

A number of us will be exhibiting our projects down at Britomart in Auckland City on Day 100, September 14th 6 -10pm. It will also be open for viewing on Sunday 15th until 4pm.

In the meantime here are a few of my highlights since Day 50.


Day 51

Day 57

Day 59

Day 69

Day 72

Day 74

Day 80

Day 81

Day 84


Friday 16 August 2013

Kitchen Lithography

I came across this video on the website Printeresting on facebook recently and thought I'd give it a whirl. It describes how to use items from your kitchen to create lithography-type prints. How cool would that be?! I love the qualities of lithography but have never been able to try it for real.

The discussion below the video helps to puzzle out what some of the materials are as the video has no narration. One of the respondents Inkteraction generously provided their English translation of the materials and so here's what I did, making a few simplifications and using products at hand in NZ:

Gather materials: Plastic cutting mat (unused), aluminium foil, white vinegar, cola, vegetable oil, paper towels, chinagraph pencil, sellotape

Sellotape the foil to the plastic cutting mat and smooth it out.
Wipe the foil down with the white vinegar to clean it.
BEWARE any greasy fingerprints WILL print.
Draw your image onto the foil with a chinagraph pencil.
Hold the plate over the sink and pour over the cola, allowing it to sit for about 7 seconds to etch into the foil.
Rinse under cold water.

Clean the chinagraph pencil away using the vegetable oil on a paper towel.
Wet the plate with a damp towel.
Your image should show up as the oil repels the water from the areas of your drawing.

Using oil-based printing ink and keeping the plate wet with water, roll out the ink thinly and ink up.
This is where you will see any extra greasy finger prints that you left behind!

With the press set tightly, print on a smooth paper - I have just used cartridge paper here.
If you don't have access to a press you can print by using the back of a spoon to burnish the back of your paper.

The print shows up the lovely grainy textures of the drawing - just like grown-up's lithograhy without the massive stone. Give it a go! 

Thursday 15 August 2013

Paintings - a selection

Cook's Bach, Rangitoto Island
Our Honeymoon suite (nfs)
2004, 635 x 850mm, acrylic on canvas

Nikau I,
Matheson's Bay, Leigh (sold)
2007, 720 x 960mm, acrylic on canvas


Pakiri Storm (sold)
2007, 630 x 430mm, acrylic on canvas

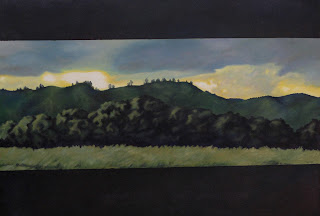
These Ancient Hills I
Rangitikei Hills (nfs)
2008, 630 x 440mm, acrylic on canvas

These Ancient Hills II
Rangitikei Hills (nfs)
2008, 630 x 440mm, acrylic on canvas

Duders Regional Park    $800
2004,   1225mm x 825mm, acrylic on canvas


Wednesday 14 August 2013

Shadow Paintings


Although I am no longer painting shadows I am still "stopped in my tracks" when I chance upon a particularly fine display. Anyone in my company at the time of my ooohing and aaaahing and grabbing for the camera, seems to raise an eyebrow and smile at me with that "what is she on about" kind of look. Never mind, I simply see the transient beauty of the carpet laid out at our feet and I merely want to capture it so it can be savoured at leisure. Firstly, I'm drawn to the patterns, then to the inky velvety depths of the shadows and the contrasts of the acid highlights.

Generally I like to prepare my canvas or board with a coloured base coat as I like to allow it to peak through, adding to the tapestry-like richness of colour. When the painting uses a lot of green I like to use red as a base coat as I love the way it makes the greens "sing" when layered on top.


Cornwall Park (nfs)
2004, 825 x 675mm, acrylic on canvas


Coyle Park (sold)
2004, 750 x 170mm, acrylic on board


Coyle Park Shadows (nfs)
2005, 825 x 675mm, acrylic on canvas


Pt Chevalier Beach (sold)
2005, 1055 x 815mm, acrylic on canvas

Mt Eden (sold)
2006, 905 x 580mm, acrylic on canvas
 I was totally enchanted by the giant moth taking flight from the crater of Mt Eden while out walking one day. Didn't anyone else see it?


Monday 12 August 2013

It's a Printing Press!


It works!
I am making-do with a laminated hardboard bed for now and I'm very happy with the results I'm getting so far. I've trialled it with printing a plexi-plate dry point with chine colle added and have also just given it a whirl with a "Kitchen Lithography" technique using aluminium foil and a chinagraph pencil drawing. 

Inked up plexi-plate with collage elements laid on ready to print.


Trial print using "Kitchen Lithography" technique.

Friday 2 August 2013

Pebble Mosaics


Here's a wee project I tackled a few years ago. I was inspired by a book called "The Complete Pebble Mosaic Handbook" by Maggy Howarth. She is an amazing UK mosaic artist who has completed very intricate public mosaics including a large one nearby in Ponsonby, Auckland, NZ. Being able to view such an intricate mosaic first-hand was very motivating and inspiring.

First up, to work out my technique, I created a gecko, a favourite creature of mine.


Pleased with how the gecko went, I then set myself up for the much bigger task of creating the sun image. In both cases, the whole mosaic needed to be completed in a single day due to the risk of rain. The pebbles are submerged into the bed of sand so that only the top edge is protruding and the pebbles are packed tightly against each other, helping to lock them in place. Once all of the pebbles are in place, a finely sieved sand/cement mix is brushed all over the surface and the excess is brushed away. The mosaic is then watered to wet the cement and it is covered with tarpaulins to leave it to set for a few days. Planning and preparation were vital to ensure that I had everything I needed on the day and so that I knew how I was going to go about executing the mosaic. 
Years later, it's still looking fab. However, before I'm tempted to do any more of these mosaics, I still remember that it was back-breaking work!!