|
| "Specimen: Manawa" by Toni Hartill |
Earlier this year I participated in the PCANZ Print Exchange.
This is the first year that this event has been run and it is hoped
it might become a regular on the PCANZ calendar.
The brief:
"Members are invited to create an edition of 10 prints, 8 of which will be randomly exchanged
with other participating members. One print will form part of a set that will be exhibited and
available for sale to raise funds towards the 2020 PCANZ Summer School Scholarship.
The remaining print will become a part of a collection showcasing the works of contemporary
PCANZ members. This will be added to the PCANZ archive currently held at the Aratoi Museum
of Art + History, Wairarapa and will be an invaluable collection to look back on in future years.
This project will also be an opportunity for members to “discover” the work of other members
and to begin, or add to, their own collection of contemporary NZ printmaking. We are hopeful
for a majority of members, of all calibers, to be involved to make this a truly representative
collection of PCANZ 2019."

Making an edition
If there is one thing I'm not keen on it's making an edition!
I know I'm not alone in this sentiment so perhaps this blog might help anyone who is breaking into a cold sweat at the thought of making an edition.
My advice to start with
- Choose a technique(s) you enjoy and that doesn't make you tear your hair out because you will need to repeat it again and again... and again.
- If you are new to editioning, keep it super simple! Choose a one-step process, something that is easy to replicate such as lino-cut or woodcut rather than something more complicated such as drypoint which requires careful wiping, especially to produce a non-varied edition.
- Tear (or cut) all of your paper to size before you begin.
- I ALWAYS print at least 2–3 extra to the required amount of prints to allow for the inevitable mistakes. Less stress! The more tricky the chance of success, the more spares I would print.
- If using multiple colours, choose and test BEFORE you begin printing the edition.
- Break the project into smaller steps, planning how you will create the image.
- Complete each step at a time. Don't try to rush it. Congratulate yourself on the completion of each step which takes you closer to the completed edition... but don't get over-excited before you've finished - stay steady and focused!
So, back to me and my editioning
I have the attention span of... a goldfish! I love researching and creating the image. I love making the plate(s) and experimenting and producing the final image. But, once I've cracked a good print, well, then I'm keen to move on to the next thing.
I'll happily print a second image to check it wasn't a fluke! It also allows me to be able to sell one/ give one away and keep one for myself. At a push I will usually aim to produce an edition of 5. On a rare occasion, and usually only if the image is a "quickie" to reprint, and/or the likelihood of successful prints is high, then I might go crazy and print 15. My largest edition to date was 25 (I think) and I can't even remember what that was for as it was so long ago.
When I helped to organize this event I too was cringing at the thought of having to produce an edition. I was due to go to Spain just before the deadline so I thought I might just sneak out of the country and not submit anything but... no, darn, I was called out on that: needed to lead by example, we wanted as many people on board as possible to make it a success, etc.
Plan B
get organized early,
plan the steps,
break it down into manageable bites
and get on with it.
Working Smarter to alleviate Stress!
I had been working on a couple of other projects at the time that had details that I thought could lend themselves to an interesting image for the exchange. I decided to work smarter not harder and, while I was creating components for these other projects, (Artist books: "Search & Rescue" and "Field Notes: Manawa") I would also create the components for this one. So much easier to strike while the inks are mixed and the press is set up AND while the techniques and ideas are fresh in my mind rather than trying to revisit sometime down the track.
Breaking it down, step by step
My image is made up of a number of components that could be created independent of each other. I decided to aim for an edition of 15 so I could send 10 for the exchange, keep one for myself and some to sell.
Step 1:
The mud: collograph with cutouts.

Step 2:
The mangrove seedling:
drypoint with hand-colouring, cutout.


Step 3:
Assembling the "main characters."

Step 4:
Tearing the paper to size.

Step 5:
Embossing the background.
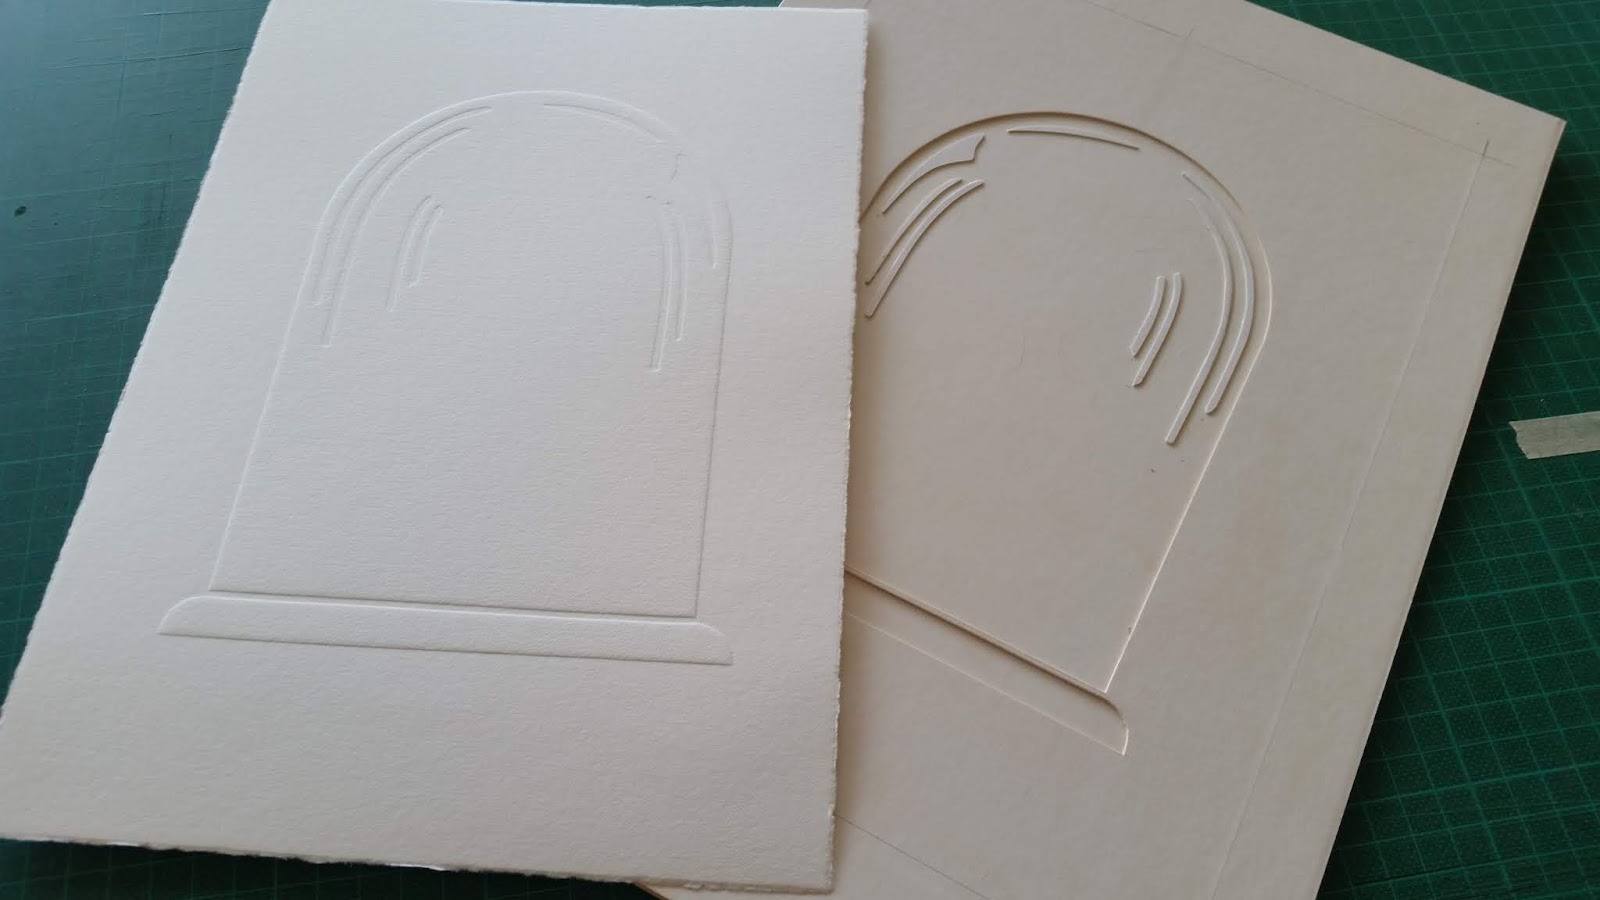
Step 6:
Assembling final image.

Step 7:
Dreaming up a title and signing the works.


Step 8 & 9:
Completing the entry form, checking I am following instructions,
then packaging up 10 and posting it off!
 |
| "Specimen: Manawa"by Toni Hartill Drypoint, watercolour, collograph, blind embossing. |
I included one of these prints in my "Field Notes" exhibition at Waiprint.
Despite my earlier reservations it has grown on me and now I'm quite fond of it.
I hope those who received it in the exchange are too.
Contact me direct if you are interested
in purchasing one of my remaining prints.
I'm totally delighted with my collection of 8 prints from PCANZ members:
Lee Brogan
Diane Harries
Toni Mosley
Jo Ogier
Kathy Reilly
Catherine Shine
Celia Walker
Lynne Wilburn
To view these and other prints in the PCANZ Print Exchange
visit the website to scroll through a slideshow of images.
A single copy of each of these prints will be offered for sale to raise funds
for the 2020 PCANZ Summer School Scholarship.
Check the website or facebook page for updates.
Thanks for visiting!